Table of Contents (23 sections)
Home renovations can be daunting, but with the right DIY solutions, you can achieve professional-quality results. This guide will take you through actionable steps, from planning your renovation to executing on a budget. Whether you're upgrading your kitchen or refreshing your living room, this tutorial focuses on actionable strategies for staging significant improvements without hiring a contractor.
1. Understanding Your Space
Before embarking on any DIY renovation project, it’s crucial to understand the space you plan to work on. Evaluate the layout, measure dimensions, and consider how natural light impacts the area. This fundamental analysis will guide your design choices.
A. Measuring and Planning
Start by using a measuring tape to get the exact dimensions of your room. Sketch a layout to visualize furniture placement, potential changes, and flow between spaces. An average kitchen renovation can range from $10,000 to $50,000, depending on materials and complexity. Knowing your budget is essential in setting realistic goals.
B. Importance of Design
Don’t underestimate the power of good design. Consider engaging with online tools that offer virtual room planners. Houzz and SketchUp are excellent for experimenting with different styles. According to UFC-Que Choisir, thoughtful planning can increase the final value of your renovations.
2. Gathering Materials and Tools
Having the right materials and tools is pivotal in executing your DIY renovations efficiently.
A. Essential Tools
You’ll need basic tools such as a drill, screwdrivers, a level, a miter saw, and measuring tape. Investing in quality tools pays off in longevity and performance.
B. Sourcing Materials
Visit local home improvement stores or online marketplaces to gather your supplies. When considering paint, research options that are low-VOC for better air quality. You can spend as little as $30 for a gallon of quality paint, making it an affordable way to refresh space.
3. Tackling Your First DIY Project
Once you’ve evaluated your space and gathered materials, it’s time to jump into your first project. Let’s consider repainting a room.
A. The Steps to Repainting
- Prepare the Room: Remove or cover furniture, and tape edges with painter's tape to protect trim.
- Choose a Quality Primer: A good primer can help the paint adhere better and enhance color.
- Select Your Paint: Use satin or eggshell for walls, and semi-gloss for trim, which adds a neat finish.
B. Pro Tips
To avoid streaks, use a roller for larger areas and a brush for corners. Misting the surface lightly with water can help the paint to spread evenly. An investment in high-quality brushes can also improve your finish and make cleanup easier.
4. Flooring Renovations
Flooring is a significant aspect of any home renovation and can change the look of a space entirely.
A. Choosing Your Flooring
Options range from hardwood to laminate or even tile. Hardwood flooring is considered a long-term investment but can cost between $5 to $10 per square foot. If you’re opting for affordability, laminate can cost around $2 to $5 per square foot.
B. Installation Tips
If you're installing laminate or vinyl, ensure that the subfloor is clean and leveled before proceeding. Always lay planks perpendicular to the light source to enhance visual effects. Watch tutorials on installing various flooring types to gain insights into techniques and common errors.
5. Kitchen Cabinets and Countertops
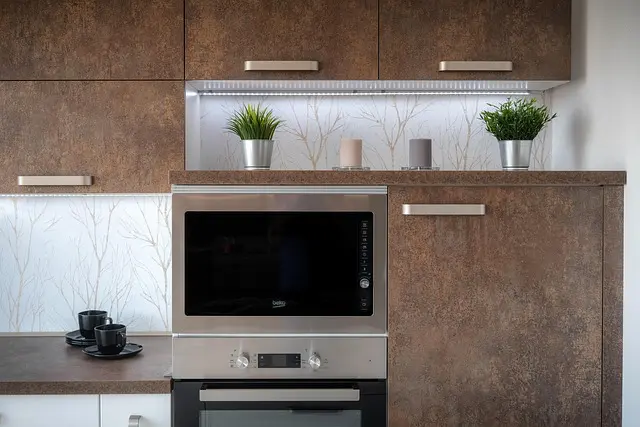
Kitchen renovations often focus on cabinets and countertops, which are primarily where you can achieve great aesthetic value.
A. Refacing Cabinets
Instead of entirely replacing cabinets, consider refacing. Sanding old cabinets and applying a fresh coat of paint can breathe new life into outdated features. It’s best to use a professional-grade cabinet paint designed for durability.
B. Selecting Countertops
If replacing countertops, explore options such as laminate, granite, or quartz. Granite, while elegant, can cost upwards of $40 to $100 per square foot. Countertops can make or break the renovation look, so choose wisely.
6. Finishing Touches
Finishing touches can be what truly elevates your DIY renovations to a professional level.
A. Lighting and Decor
Install new light fixtures to establish ambiance. Use LED bulbs for energy efficiency, which can also add a modern touch. Consider placing mirrors strategically to create the illusion of more space.
B. Accessorizing
Accessorize with plants, art, or new textiles for drapes and cushions. Remember, small details often have a significant impact.
📺 Resources Video
> 📺 For further exploration: Watch our video on Successful DIY Home Renovations to see the steps in action. Search on YouTube: successful DIY home renovations 2026.
Checklist before DIY Renovations
- [ ] Analyze the space and plan the design.
- [ ] Gather all required tools and materials.
- [ ] Prepare the area before starting work.
- [ ] Follow safety precautions at all times.
- [ ] Schedule ample time for each project.
Glossary
| Term | Definition |
|---|---|
| DIY | Do It Yourself, a method of building or renovating spaces without professional help. |
| Refacing | A cost-effective way to update cabinets by replacing faces and finishes without replacing the entire structure. |
| Subfloor | The layer of flooring beneath the finish surface that provides structural support. |
---
📺 Pour aller plus loin : successful DIY home renovations 2026 sur YouTube