Table of Contents (16 sections)
Creating a home that reflects your style and meets your needs often requires some upgrades. Fortunately, you don’t need to hire a professional to achieve that look or functionality. With a little creativity, the right tools, and some determination, you can implement professional-quality DIY solutions for home upgrades. This article will guide you through various projects that not only enhance your living space, but also add value to your home.
1. Understanding DIY Solutions for Home Upgrades
What Are DIY Solutions? DIY stands for "Do It Yourself." It encompasses a variety of projects that homeowners undertake without professional assistance, allowing them to modify or improve their living environments significantly. According to recent studies, about 70% of homeowners engage in DIY home improvement projects. This statistic showcases the growing trend of homeowners seeking to personalize and enhance their spaces without the high costs associated with contractors. The benefits include:
- Cost Savings: Utilizes often pre-existing materials and tools, reducing external labor costs.
- Customization: Allows you to tailor every aspect of your upgrade to suit your aesthetic and functional needs.
- Skill Development: Enhances your abilities and confidence in handling home repair and improvement projects effectively.
But why focus on professional-quality upgrades? The answer lies in the end result. Achieving a high-quality finish can elevate your home’s appeal, making it more attractive to potential buyers or simply enhancing your enjoyment of your personal space.
2. Preparing for Your DIY Project
Before diving into any DIY solutions, preparation is key. Here’s a structured approach:
Step 1: Define Your Goals
What do you want to achieve with your upgrade? Whether it’s improving functionality, increasing home value, or simply aesthetic enhancement, having a clear goal will help you choose the right project.
Step 2: Research and Gather Inspiration
Look for design ideas and tutorials online. Websites like Pinterest or home improvement blogs are excellent resources for exploring styles and techniques.
Step 3: Create a Budget
Decide how much you’re willing to spend and stick to that budget. Remember to factor in tools you might need to purchase if you don’t already own them.
Step 4: Assess Your Skills
Evaluate your skill level honestly. Some projects require advanced skills like electrical work or plumbing. Don’t hesitate to seek professional help if needed.
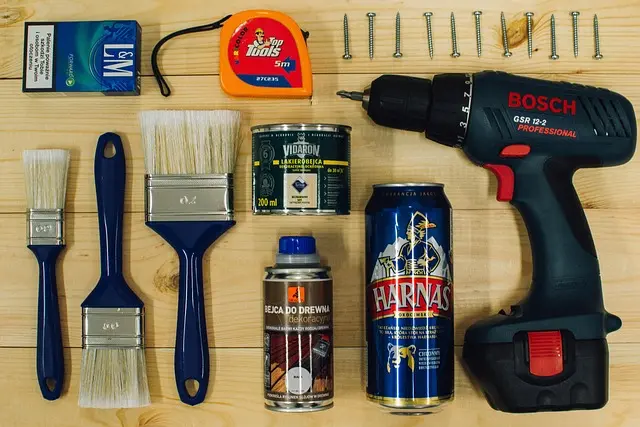
Step 5: Gather Tools and Materials
Compile a list of everything you’ll need.
- Tools: Hammer, drill, saw, etc.
- Materials: Paint, wood, nails, etc.
We have selected several products to assist you with your projects, making your DIY journey smoother and more efficient.
Sports Licensing Solutions 3 ft. W X 3 ft. L Black Anti-Fatigue Rubber Utility Mat
acehardware.com


3. Step-by-Step Home Upgrade Projects
Project 1: Installing a Backsplash
A kitchen backsplash can transform the look of your space with a relatively low time and cost investment.
Step 1: Choose Your Material
Consider materials such as ceramic tile, glass, or even peel-and-stick options for ease.
Step 2: Prepare the Wall
Clean the wall surface thoroughly. Remove any grease or dirt.
Step 3: Measure and Plan
Measure the wall area to determine how much material you’ll require. Plan your design on paper.
Step 4: Install
Use adhesive to apply your material, carefully following your design layout. If using tile, apply grout between tiles once installed.
Pro Tip
Invest in a quality tile cutter or specific tools for your selected materials to achieve the best finish.
Project 2: Painting Walls
Painting is one of the simplest and most impactful upgrades you can do.
Step 1: Choose the Right Color
Select colors that not only reflect your style but also the room’s function.
Step 2: Prepare the Room
Remove furniture or cover it with drop cloths. Tape edges with painter's tape for clean lines.
Step 3: Apply Primer
If you're making drastic color changes, applying primer may be necessary. It ensures a clean base for your paint.
Step 4: Paint
Use a high-quality roller for walls and a brush for corners and edges.
Checklist
- Ensure proper ventilation.
- Apply at least two coats for longevity.
4. Comparing DIY and Professional Solutions
| Criteria | DIY Solutions | Professional Solutions | Verdict |
|---|---|---|---|
| Cost | Lower costs with available tools | Higher due to labor and expertise | DIY is budget-friendly |
| Time Required | Varies, but often longer | Faster with a team of experts | Professionals can save time |
| Quality | Depends on skill, potential flaws | Consistently high-quality work | Professionals provide assurance |
| Customization | Fully customizable | Limited to contractor’s offerings | DIY allows for personal touch |
5. FAQs About DIY Solutions
Q: Can I do major renovations myself?
A: Yes, but significant projects such as structural changes often require permits or professional assistance.
Q: What are the most popular DIY projects?
A: Popular options include painting, landscaping, and small remodels like kitchen backsplashes and bathroom updates.
Q: Do I need permits for DIY projects?
A: It depends on the project and local regulations; check with your local building authority.
Q: How can I ensure a professional-looking finish?
A: Invest in good quality materials and take your time.
📺 Resource Video
📺 For further insights: Explore professional tips on home upgrades, uncover strategies for transforming your space. Search on YouTube: "DIY home upgrade tips 2026."


Clinique Blackhead Solutions 7 Day Deep Pore Cleanse & Scrub for All Skin Types - 125ml
clinique.com
Checklist Before Starting Your Project
- [ ] Define project goals
- [ ] Research design ideas
- [ ] Create a detailed budget
- [ ] Assess skill levels
- [ ] Gather all necessary tools and materials
Glossary
| Term | Definition |
|---|---|
| DIY (Do It Yourself) | Projects completed without professional help, often involving home improvements. |
| Backsplash | A protective surface, typically found in kitchens and bathrooms, to avoid stains on walls. |
| Priming | The application of a preparatory coat of paint before the main layers are applied. |
In conclusion, DIY solutions for home upgrades can drastically raise the value and appeal of your space long term. With the right preparation and execution, you can turn simple home improvement tasks into remarkable transformations. Get started today on your projects, and don’t forget to check our carefully curated product recommendations for your next upgrade!
📺 Pour aller plus loin : DIY home upgrade tips 2026 sur YouTube
Recommended products
Selected by our experts


Clinique Redness Solutions Makeup Broad Spectrum SPF 15 With Probiotic Technology, Calming Honey - 1 fl. oz./30 ml
clinique.com