Table of Contents (12 sections)
Creating effective DIY solutions requires not just creativity, but also strategic planning and execution. In this guide, we’ll walk you through the steps to achieve results that rival professional work. Whether you're tackling home repairs, crafting, or any project that needs an expert touch, this tutorial will help guide you to success.
1. Understanding Effective DIY Solutions
Effective DIY solutions are approaches to projects that rely on personal skills and accessible materials. The essence of DIY is rooted in the idea of self-sufficiency and creativity. Whether it’s building a shelf or repurposing furniture, the goal is to achieve a quality that stands out.
Research conducted by UFC-Que Choisir indicates that around 70% of individuals engaging in DIY enjoy the process and the end result can save significant costs compared to hiring professionals. Understanding your project’s requirements is key. Consider what you’re trying to accomplish, the tools you have at your disposal, and the time you can commit.
Why Go DIY? Not only can it save you money, but creating something with your own hands can be fulfilling. Plus, you get to customize the end product to meet your specific needs or taste. Always remember, setting realistic expectations is vital to ensure a positive experience.
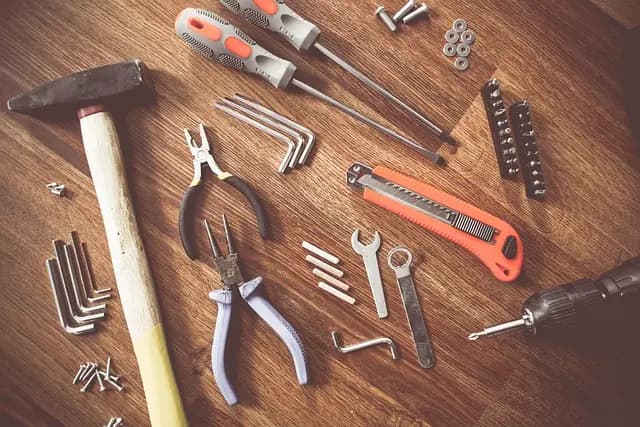
2. Gathering Your Tools and Materials
Before diving into any project, having the right tools and materials is essential. This not only makes the process more efficient but also minimizes mistakes and frustrations. Begin by making a list based on your project requirements.
Here’s a typical checklist for a DIY woodworking project:
- Measuring tape: To ensure accurate dimensions.
- Saw: For cutting wood to size.
- Drill: Essential for making holes, assembling parts.
- Sandpaper: To smooth out rough edges.
- Paint or wood finish: For aesthetics and protection.
Having a well-organized workspace is another pro tip. Keep your tools easily accessible and your workspace clean. According to 60 Millions de Consommateurs, a tidy workspace can increase efficiency by up to 30%.
3. Designing Your Project
Design is an often overlooked yet crucial aspect of effective DIY solutions. Sketching out your project or creating a digital plan can help visualize the outcome and allow you to identify any potential challenges upfront.
Consider using design software or simply drawing it out on paper. Additionally, researching similar projects online can provide insights into common pitfalls and creative solutions. It may also help to consult online platforms for inspiration, where skilled DIYers share their designs and experiences. Integrating elements of functionality and aesthetics will elevate your project significantly.
4. Step-by-Step Implementation
Once you’ve gathered your materials and designed your project, it’s time to start building! Here’s a step-by-step framework to follow:
- Preparation: Clear your workspace and lay out all tools and materials.
- Initial Measurements: Measure twice to avoid mistakes while cutting materials.
- Assembling Structures: Begin by assembling the foundational elements of your project first.
- Finishing Details: After the main structure, focus on finishing touches like sanding and painting.
Take your time and don’t rush. Slow, deliberate work leads to better results. Also, familiarize yourself with the proper techniques for each tool to avoid injuries and mishaps during your project. Utilize the pros' tips you’ve researched to ensure a smoother process.
5. Troubleshooting Common Issues
Every DIY project comes with its own set of challenges. Knowing how to effectively troubleshoot can save you time and resources. Here are a few common issues:
- Misaligned cuts: Always ensure to check your measurements twice. If cuts become misaligned, consider adding trim to cover gaps.
- Paint runs: This can usually happen when applying too thick a layer. A light coat applied in multiple layers works best.
- Structural Weakness: Reinforce crucial joints with screws or brackets to ensure stability.
Stay patient and flexible with your plans. According to anecdotal evidence from seasoned DIYers, the ability to adapt is crucial for a successful outcome.
6. Final Touches and Cleanup
Once your project is completed, it’s time for those final touches. This may include cleaning the workspace, applying a finish, or even staging your new creation. Ensure to let everything dry or settle as needed. Afterward, take a moment to step back and admire your work—it’s essential to celebrate your accomplishments!
Finally, clean your tools and organize your materials for future projects. Taking good care of your equipment ensures longevity and efficiency in the long run.
7. Tips for Future DIY Projects
- Remember the 80/20 rule: Spend 80% of your time planning and prepping, 20% executing.
- Keep learning: The more projects you complete, the better you’ll become. Each task teaches valuable lessons.
- Stay safe: Always wear protective gear such as gloves and goggles. Safety is paramount, especially with power tools.
Checklist before Your DIY Project
- [ ] Gather all necessary tools
- [ ] Create a detailed project design
- [ ] Prepare your workspace
- [ ] Double-check all measurements
- [ ] Clean up after completion
💡 Expert Insight: Mastering DIY takes practice and patience. Most seasoned DIYers mention improvement comes with experience. Don’t hesitate to seek help from online communities or tutorials when necessary.
Glossary
| Terme | Définition |
|---|---|
| DIY | Do-It-Yourself; the practice of creating or repairing things on your own. |
| Materials | Various substances needed to complete your project, such as wood, nails, and paint. |
| Tools | Instruments used to perform tasks; for instance, saws, hammers, and drills. |
Sports Licensing Solutions 3 ft. W X 3 ft. L Black Anti-Fatigue Rubber Utility Mat
acehardware.com


📺 Resource Video
> 📺 For More Insights: Watch our detailed video tutorial on creating seamless DIY solutions that appear professionally done. Search on YouTube: "how to achieve DIY professional results".
📺 Pour aller plus loin : DIY Painting Tricks to Get Pro Level Results! sur YouTube
Recommended products
Selected by our experts


Clinique Redness Solutions Makeup Broad Spectrum SPF 15 With Probiotic Technology, Calming Honey - 1 fl. oz./30 ml
clinique.com