Table of Contents (17 sections)
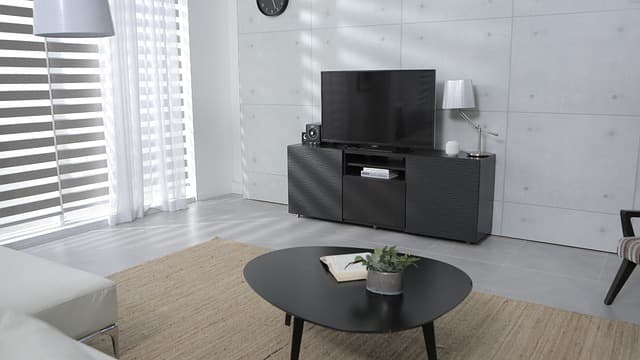
In today’s world of home organization, DIY shelving solutions have become increasingly popular. These versatile systems provide both functional storage and a chance for creative expression. Building your own shelves not only saves money but also allows you to tailor designs that fit your specific needs and style preferences. Whether you're organizing a cluttered room or showcasing your favorite books and decor, professional-quality DIY shelving is within your reach.
Step 1: Understanding Your Space
Before you start building, it’s crucial to assess your available space. Walk through the areas where you envision having shelves and take measurements. Consider the height, width, and depth that will best suit your needs. Utilizing a floor plan can be an excellent way to visualize your layout.
Remember, the right shelving can enhance both functionality and aesthetic. According to a survey by the National Association of Home Builders, over 70% of homeowners feel that well-organized spaces improve their quality of life. As such, identifying the ideal shelving solution for bedrooms, living rooms, or garages can transform these spaces significantly.
Factors to Consider
- Size and Dimensions: Ensure the shelves will fit comfortably within your space.
- Weight Capacity: Determine the load your shelves will need to hold, especially for heavier items like books or kitchenware.
- Style and Aesthetics: Choose materials and designs that complement your home’s interior.
Step 2: Gathering Materials
Once you've assessed the space, select materials that will not only support your shelving needs but also align with your chosen aesthetic. Common DIY shelving materials include plywood, medium-density fiberboard (MDF), or reclaimed wood. Here’s a breakdown of some materials:
| Material | Pros | Cons | Best For |
|---|---|---|---|
| Plywood | Affordable, strong | Can warp if not treated | General DIY projects |
| MDF | Smooth finish, easy to paint | Less durable under weight | Indoor shelves |
| Reclaimed Wood | Unique appearance, eco-friendly | Cost varies, requires more effort to source | Rustic/Industrial looks |
Sports Licensing Solutions 3 ft. W X 3 ft. L Black Anti-Fatigue Rubber Utility Mat
acehardware.com


Step 3: Design Your Shelves
Next, sketch your shelving design. Consider how many shelves you need, their spacing, and additional features like brackets or back panels. Using a design software or even sketching on paper can help bring your ideas to life. Many DIY enthusiasts find inspiration in platforms like Pinterest or Houzz. According to data, 79% of users on Pinterest report using it for home improvement ideas, making it a great source for design inspiration.
Shelf Height and Spacing Guidelines
- Standard shelf height: 12 to 15 inches for books, 18 inches for decorative items.
- Allow at least 24 inches between shelves for larger items.
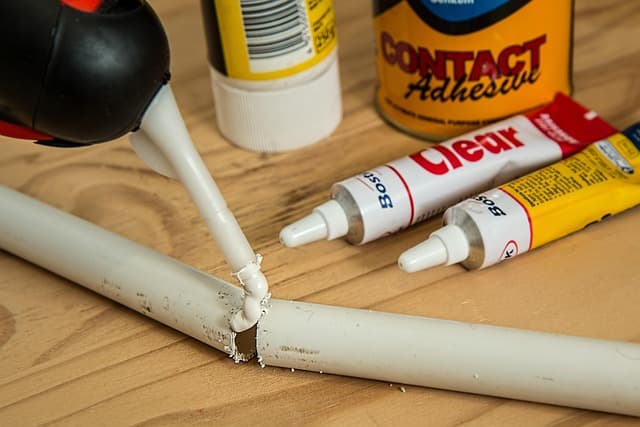
Step 4: Preparing and Cutting Materials
This step requires precision and attention to detail. You’ll need to cut your materials according to your design specifications. Here are a few tips:
- Measure Twice, Cut Once: Always double-check your measurements.
- Use a circular saw or table saw for clean edges.
- Sand down edges to avoid splinters and ensure a smooth finish.
Step 5: Assembling Your Shelving
After cutting your materials, it’s time for assembly. Depending on your design, you may need different kinds of brackets or fasteners:
- Shelf brackets: Allow for support under the shelves.
- Wall anchors: Important for stability, especially for heavy items.
Assembly Steps
- Start with the base if your shelves are freestanding.
- Attach brackets to the wall for wall-mounted shelves.
- Secure the shelves to the brackets.
- Ensure everything is level and adjusted before fully tightening.
Step 6: Finishing Touches
Once your shelves are assembled, it’s time for the finishing touches: paint or stain. Choosing the right finish can enhance longevity while providing a polished look. A well-applied coat of paint can transform raw materials into elegant shelving.
Painting and Staining Tips
- Use primer for better paint adherence.
- Choose a finish that matches your home decor.
- Allow sufficient drying time between coats.


Clinique Blackhead Solutions 7 Day Deep Pore Cleanse & Scrub for All Skin Types - 125ml
clinique.com

Clinique UV Solutions Hydrating Sunscreen Broad Spectrum SPF 50 - 40 ML
clinique.com
Step 7: Organizing and Styling
Finally, style your shelves to reflect your personality and serve your needs. Utilize decorative bins, vases, or framed photos to create visual interest. According to interior design trends, adding personal items can make a space feel more inviting and lived-in.
Tips for Organizing
- Group similar items together for easy access.
- Use decorative boxes for smaller items.
- Leave some empty space for additional items.
Checklist Before You Start
- [ ] Measure the space
- [ ] Gather materials and tools
- [ ] Create a design plan
- [ ] Cut all materials accurately
- [ ] Assemble and secure shelves
- [ ] Paint or stain finishes
- [ ] Style and organize items
Glossary
| Term | Definition |
|---|---|
| MDF | Medium-density fiberboard, a composite material made from wood fibers. |
| Brackets | Hardware used to support shelves against the wall. |
| Load Capacity | The maximum weight a shelf can safely hold. |
{
Recommended products
Selected by our experts


Clinique Redness Solutions Makeup Broad Spectrum SPF 15 With Probiotic Technology, Calming Honey - 1 fl. oz./30 ml
clinique.com