Table of Contents (14 sections)
Home improvement is more than just a task; it's an opportunity to leverage your creativity, refine skills, and enhance the value of your living space. Pro-level DIY solutions are not only about getting the job done but doing it effectively and with finesse. In this guide, you will learn step-by-step how to apply professional techniques to your home projects, covering everything from preparation to execution. Let's dive into the details!
🏠 Understanding Pro-Level DIY Solutions
Pro-level DIY solutions signify an advanced understanding and application of home improvement techniques that surpass the typical homeowner's approach. These solutions often employ tools, materials, and methods used by professionals, allowing you to obtain results that are comparable to those achieved by seasoned contractors. By utilizing these strategies, you not only achieve functional improvements but also add aesthetic value and potentially increase your home's market value.
Why Choose Pro-Level DIY Over Conventional Methods?
Many homeowners opt for simple, quick fixes that may suffice temporarily but fail in the long run. According to a survey by UFC-Que Choisir, over 60% of DIY projects require eventual professional intervention due to improper execution. Embracing professional methodologies ensures longevity, durability, and quality in your home projects. Whether it’s painting, tiling, or landscaping, applying these solutions can save you time and money while achieving superior results. Plus, you'll develop valuable skills that you can apply in future projects.
🛠️ Step-by-Step Guide to Implement Pro-Level Solutions
Following a structured approach can help streamline your DIY projects and ensure you achieve expert-level results. Here are the essential steps to follow:
Step 1: Assess Your Skills and Tools
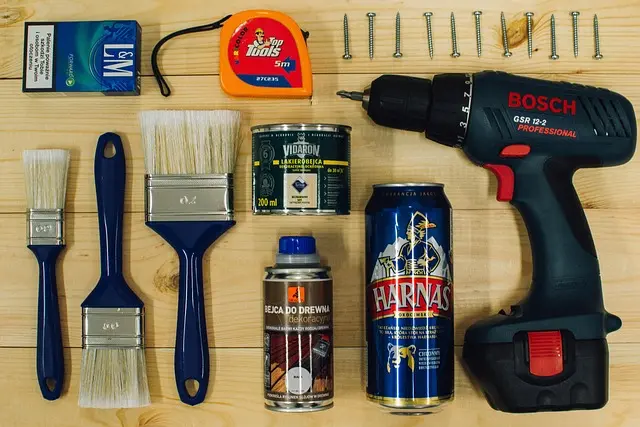
Before diving into your project, take a comprehensive inventory of your skills and the tools at your disposal. Are you comfortable with power tools? Do you have access to professional-grade materials? Understanding what you can realistically achieve will guide your project planning. For instance, if you're planning to install crown molding, ensure you have a miter saw and know how to use it. If you're lacking equipment, consider renting or borrowing to access pro-level tools.
Step 2: Research and Plan Your Project
An essential part of implementing pro-level DIY solutions is thorough research and meticulous planning. Gather inspiration from home improvement shows, DIY blogs, and videos. Create a step-by-step plan outlining each phase of your project, checking that you include measurements, materials needed, and tool requirements. This approach not only ensures clarity but also helps you avoid common pitfalls, such as underestimating material needs. Create a checklist of all items you require before starting.
Step 3: Prepare Your Work Environment
A cluttered or unsafe work environment can hinder the efficiency of your DIY project. Clear the area where you will be working and ensure proper lighting. Lay down protective coverings for floors and furniture, and wear appropriate safety gear. When working with paints or adhesives, good ventilation is crucial. Always keep your workspace organized; it saves time and minimizes the risk of accidents.
Step 4: Master Professional Techniques
Familiarize yourself with professional techniques relevant to your project. For example, when painting, use the 'cut and roll' method for an even coat. With tiling, learn the basics of measuring, spacing, and applying adhesive to achieve a clean finish. There are numerous resources available, including tutorials and classes that can help enhance your skills. Remember to practice these techniques in small areas before tackling the main section of your project.
Step 5: Execute with Precision
Now comes the execution part. Work steadily and follow your plan precisely. If you're working on carpentry, double-check each cut before making it. For wall installations, ensure you're following levels and straight lines. Patience is key here – rushing can lead to mistakes that may require costly corrections later on. Always refer back to your research as you work to ensure you're adhering to professional standards.
Step 6: Review and Finish
Once the main tasks are completed, take a step back and review your work. Look for any imperfections or areas that may need touch-ups. Completing your project with finishes such as sanding, sealing, or painting can elevate the final look. Don’t skip cleaning your work area thoroughly once you’re done; proper cleanup ensures safety and maintains the longevity of your tools and projects.
Sports Licensing Solutions 3 ft. W X 3 ft. L Black Anti-Fatigue Rubber Utility Mat
acehardware.com


📺 Resource Video
> 📺 For further insights: Watch “Mastering Pro-Level DIY Techniques” on YouTube for expert tips and tricks. Search for: Pro-Level DIY solutions tutorial 2026.
Checklist Before You Start Your DIY Project
- [ ] Assess personal skills and tool inventory
- [ ] Research techniques and gather materials
- [ ] Prepare the work environment
- [ ] Practice necessary techniques
- [ ] Follow the set plan while executing the project
- [ ] Review and finish professionally
Glossary
| Term | Definition |
|---|---|
| Pro-Level DIY | Advanced do-it-yourself practices that yield professional results. |
| Execution | The act of carrying out the steps planned in a project. |
| Review | The final assessment of a completed project to ensure quality and completeness. |
---
📺 Pour aller plus loin : Pro-Level DIY solutions tutorial 2026 sur YouTube
Recommended products
Selected by our experts


Clinique Redness Solutions Makeup Broad Spectrum SPF 15 With Probiotic Technology, Calming Honey - 1 fl. oz./30 ml
clinique.com