Table of Contents (16 sections)
DIY projects can transform your home, but achieving professional-quality results often feels out of reach. The key to success lies in understanding pro-quality DIY solutions—a blend of accurate techniques, quality materials, and strategic planning. Our guide aims to empower you with the skills and knowledge to tackle your projects confidently.
What Are Pro-Quality DIY Solutions?
Pro-quality DIY solutions refer to techniques and methods that elevate the standard of home improvement projects to a professional level. These methods ensure not only aesthetic appeal but also durability and functionality. As homeowners increasingly seek personalized spaces, understanding what qualifies as a pro-quality solution is essential.
For example, consider how a professional painter prepares a space: they meticulously tape edges, use high-quality paints, and invest in proper tools. Similarly, adopting a pro approach in your DIY projects can lead to impressive results that reflect your personal style while enduring the test of time. Research has shown that homeowners who plan extensively and invest in quality materials often yield better outcomes (source: UFC-Que Choisir).
Checklist for Pro-Quality Projects
- Define your project goals.
- Research techniques and tools needed.
- Create a budget and timeline.
- Gather high-quality materials and tools.
- Make a step-by-step plan for execution.
Step-by-Step Process to Achieve Professional Results
Achieving professional-quality results in your DIY projects is a methodical process. Here’s a detailed guide that takes you through the necessary steps:
Step 1: Planning Your Project
Successful DIY begins with thorough planning. Start by defining the specific outcome you desire. Visualize the end result—this could be a room makeover, furniture restoration, or landscape design. Delve into details about dimensions, colors, and styles. Use online design software or simply sketch ideas. Don't forget to include necessary permits if your project alters structural aspects, as per local regulations.
Step 2: Gather Quality Materials
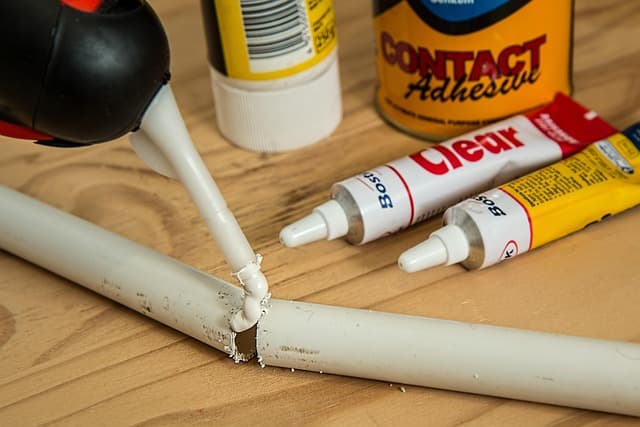
Utilizing high-quality materials is a cornerstone of professional DIY solutions. Invest in sturdy woods, premium paints, and reliable tools. Research product reviews and feedback to select the best items for your needs. Brands known for durability, safety, and ease of use should be prioritized. According to our experience, choosing the right paint or tool can drastically affect the project outcome.
Step 3: Prepare Your Workspace
Creating a dedicated and organized workspace is crucial. Ensure good lighting and sufficient room to maneuver. Clear the area of unnecessary items, removing anything that may cause distractions or hazards. Safety should also be on your mind; wearing appropriate gear—such as gloves, goggles, and masks—can greatly reduce the risk of accidents during the DIY process.
Step 4: Follow Professional Techniques
There are several techniques employed by professionals that can elevate your DIY work:
- Prepping Surfaces: Sanding, cleaning, and priming surfaces allow for better finishes.
- Measuring Accurately: Use quality measuring tools to avoid errors that can impact the entire project.
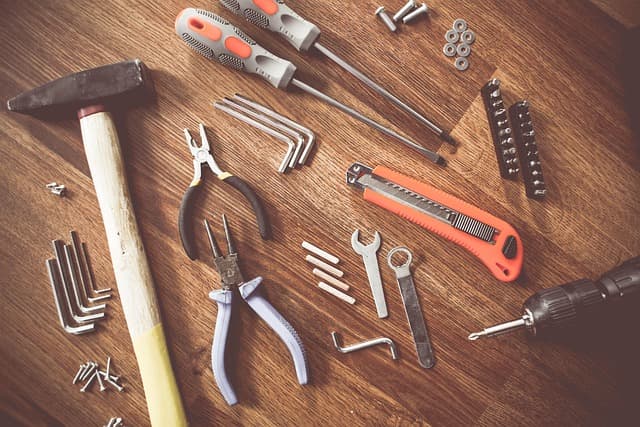
- Using the Right Tools: Invest in essential tools—whether it’s a good level for hanging pictures or a quality saw for woodworking.
Step 5: Execution and Adjustment
As you start your project, stay flexible. It’s normal to make adjustments along the way. Document each stage; this will help you avoid mistakes and allow for easier corrections. Keeping a project journal can be beneficial. Take notes on improvements you want to make for future projects.
Step 6: Finishing Touches
The finishing touches can often make or break a project. Spend time on details—these will show in the final product. Whether it’s smoothing out edges, applying final coats, or ensuring everything is properly aligned, thoroughness at this stage reflects professionalism. Be patient; good things take time!
Sports Licensing Solutions 3 ft. W X 3 ft. L Black Anti-Fatigue Rubber Utility Mat
acehardware.com


Common Pitfalls to Avoid
- Rushing the Process: Mistakes often happen when you rush. Allow yourself enough time for each step.
- Neglecting Safety: Always prioritize safety measures to prevent injuries.
- Choosing Quality Over Cost: Don’t skimp on critical materials; they impact the final outcome.
- Ignoring Local Regulations: Be aware of laws and permits that may apply to your projects.
Comparison of DIY Tools
| Tool Type | Option A | Option B | Verdict |
|---|
| Power Drill | Cordless Lithium-Ion | Corded Electric | Cordless offers flexibility.
| Paint Sprayer | Electric HVLP | Manual Pump | Electric provides ease.
| Circular Saw | Corded | Battery-Powered | Corded for heavy tasks.
| Sander | Orbital | Belt | Orbital is versatile.
📺 Resource Video
> 📺 To go further: Check out video tutorials on professional DIY techniques. Look for videos on YouTube with keywords like "DIY professional tips 2026" for detailed guides.
Glossary
| Term | Definition |
|---|---|
| DIY (Do It Yourself) | A method of creating or fixing items independently without professional help. |
| HVLP (High Volume Low Pressure) | A paint-spraying technique minimizing overspray and maximizing control. |
| Cordless Tool | A tool powered by a rechargeable battery, providing greater mobility. |


Clinique Blackhead Solutions 7 Day Deep Pore Cleanse & Scrub for All Skin Types - 125ml
clinique.com

Clinique UV Solutions Hydrating Sunscreen Broad Spectrum SPF 50 - 40 ML
clinique.com
Checklist Before Starting Your Project
- [ ] Define Project
- [ ] Research Tools
- [ ] Purchase Quality Materials
- [ ] Prepare Workspace
- [ ] Safety Gear Ready
- [ ] Document Process
- [ ] Allow Time for Finishing
📺 Pour aller plus loin : DIY professional tips 2026 sur YouTube
Recommended products
Selected by our experts


Clinique Redness Solutions Makeup Broad Spectrum SPF 15 With Probiotic Technology, Calming Honey - 1 fl. oz./30 ml
clinique.com