Table of Contents (11 sections)
Creating professional DIY solutions can turn ordinary home projects into extraordinary works of art. Whether you're renovating a room, crafting furniture, or handling repairs, having a systematic approach can greatly enhance the final outcome. This guide is here to provide you with comprehensive, actionable steps to achieve professional results on every DIY project you embark on.
Understanding Professional DIY Solutions
Professional DIY solutions refer to techniques and methods utilized by experienced DIYers and professionals that elevate the quality of home projects beyond the typical amateur approach. These solutions involve selecting the right materials, using advanced tools, and applying expert methods to ensure durability, functionality, and aesthetic appeal.
Why should one strive for professional-level DIY solutions? According to a report from UFC-Que Choisir, home improvement projects can increase property value by approximately 15% when executed to high standards. This means that a small investment in time and resources can yield significant returns. Furthermore, professional DIY techniques enhance the longevity of your projects, reduce the frequency of repairs, and often save money in the long run.
Step 1: Plan Your Project
Before diving into any DIY project, thorough planning is essential. This step includes defining your goals, assessing your skills, and gathering necessary materials and tools. Start by creating a detailed project outline that lists every task involved, from acquisition of materials to the final decorative touches. This helps to keep the project structured and on track.
Consider tools and materials that are necessary to achieve professional results. For instance, investing in a high-quality blender can significantly affect the quality of your paint mix or finishing material if that’s part of your project. Proper planning also involves understanding your workspace; ensure you have ample space to work and that you can store tools and materials effectively while keeping safety in mind.
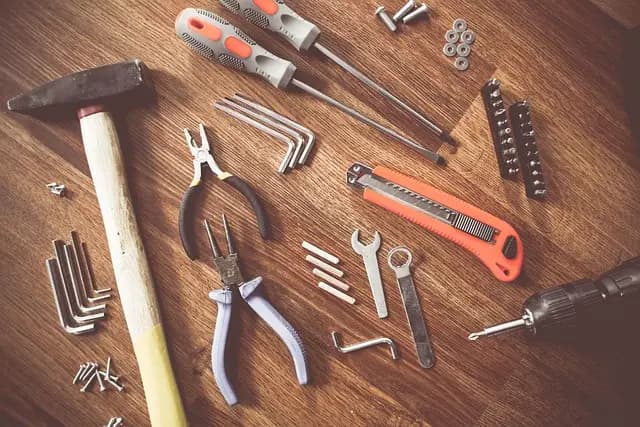
Step 2: Gather Tools and Materials
Selecting the right tools and materials is crucial for achieving a professional finish. Tools should match the scale of the project. For smaller tasks, handheld tools may suffice, but larger jobs might require power tools for efficiency. Materials should also be high-quality; using inferior materials for the sake of saving money typically leads to disappointing results.
Prioritize tools like drills, saws, and quality hand tools specific to your project requirements. For instance, using professional cleaning equipment can help maintain cleanliness and safety in your workspace, which is vital for a professional finish. Once collected, organize them in a manner that allows easy access throughout your project.
Step 3: Execute with Precision
Once you’ve planned and gathered everything, the execution phase begins. It’s important to follow your project outline strictly. Set measurable targets for each phase, ensuring you spend adequate time on tasks like measuring, cutting, and assembling.
A common pitfall in DIY projects is rushing through the execution phase; this often leads to mistakes that can compromise the entire project. Ensure you have the time set aside for revisions and corrections. According to research by the National Association of Home Builders, many DIY projects fail due to inadequate planning and hasty execution.
Step 4: Focus on Finishing Touches
The finishing touches can make or break a project. After all structural work is completed, it’s time to focus on aesthetics. This includes sanding surfaces, painting, and adding any decorative elements. Professional-grade finishes often require patience and skill. For example, allowing paint to dry fully between coats and sanding between coats can drastically improve the end result.
Don't overlook details such as hardware choices; even high-quality projects can appear lackluster if they are completed with uninspiring fixtures. Enhance the overall look of your project by selecting fixtures that complement the material and style of your work.
Step 5: Maintain Your Project
Once your project is complete, it’s vital to maintain it. Regular upkeep not only prolongs the life of the project but also keeps it looking professional. Make a maintenance schedule for periodic checks and touch-ups to ensure everything remains in good working condition.
For example, if your project involves an outdoor installation, be mindful of seasonal weather changes and take necessary precautions to protect it. Applying a sealant or protective coating can extend the life of wood projects, while regular inspections can help catch issues like rust or rot early.
Checklist Before You Start
- [ ] Define project goals and objectives
- [ ] Gather all tools and materials
- [ ] Create a detailed project outline
- [ ] Ensure you have a suitable workspace
- [ ] Check for a maintenance plan post-completion
🧠 Quiz rapide: What is the most important step in a DIY project?
- A) Execution
- B) Planning
- C) Finishing Touches
Réponse : B — Effective planning ensures the entire project runs smoothly, reduces errors, and enhances the final product.
Glossaire
| Terme | Définition |
|---|---|
| DIY (Do It Yourself) | Un projet réalisé par soi-même sans aide professionnelle. |
| Finishing Touches | Derniers détails ajoutés pour améliorer l'apparence d'un projet. |
| Component Material | Matériau utilisé dans la fabrication d'un projet spécifique. |
> 📺 Pour aller plus loin: Exploring Professional DIY Projects in 2026, a detailed walkthrough of modern DIY techniques. Search YouTube for: "advanced DIY project techniques 2026".
Recommended Products
- - - Word Count: 1054
📺 Pour aller plus loin : advanced DIY project techniques 2026 sur YouTube
Recommended products
Selected by our experts

Metropolitan Vacuum Cleaner Co., Inc. Professional Auto Detailing Vacuum
sharperimage.com
Professional Blender, Commercial Countertop Blenders, 68 oz Glass Jar Blender Combo, Stainless Steel for Frozen Drinks
bedbathandbeyond.com
Professional Blender, Commercial Countertop Blenders, 68 oz Glass Jar Blender Combo, Stainless Steel for Frozen Drinks
bedbathandbeyond.com

VEVOR - Blender for Smoothies, 61 oz 1400W, Professional Blender with Powerful Motor, Multi-Functional Food Processing Blender - Dark Gray
bestbuy.com

Professional Dishwasher Door Panel Kit for Viking FDWU524 Dishwasher - Cast Black
bestbuy.com

Professional Dishwasher Door Panel Kit for Viking FDWU524 Dishwasher - Damascus Gray
bestbuy.com