Table of Contents (10 sections)
What are Professional DIY Solutions?
Professional DIY solutions refer to home improvement or crafting projects executed with proficiency, often using better-than-average skills and knowledge. These projects aim to achieve a quality appearance and functionality that rivals that of professionally completed work. As per reports from UFC-Que Choisir, the demand for DIY home improvement continues to grow, driven by people’s desire for personalized living spaces and cost savings. Engaging in professional-grade DIY projects not only saves money but can also enhance your skills, adding a sense of accomplishment.
A recent survey revealed that approximately 70% of homeowners engage in DIY projects, many of which aim for aesthetics that match professional standards. So why settle for mediocre results? With the right knowledge, tools, and attitude, anyone can turn a simple idea into a stunning realization.
Step 1: Planning Your Project
Effective planning is the cornerstone of any professional DIY solution. Begin by defining the specific goals of your project. Are you redecorating a room, building a piece of furniture, or renovating an outdoor space? It's vital to have a clear vision of the end result. Start by sketching out your ideas and draft measurements to fit your space.
Next, assess your current skills and identify areas where you might need to improve. For instance, if you’re unfamiliar with woodworking but plan to build a shelf, consider taking a quick online course or watching tutorial videos. Utilize resources available through platforms like YouTube, which offers countless DIY videos catering to various skill levels. Planning also includes budgeting—determine how much you’re willing to spend and allocate funds to materials and tools accordingly.
It's also wise to create a timeline to keep your project on track, identifying key milestones in the process of completion. By doing this, you ensure a structured approach that enhances efficiency.

SPELAB EGR/DPF Delete Kit 2008-2010 Ford 6.4L Powerstroke F250 F350 F450
spelabautoparts.com

VVOR Professional Blender with Shield, Commercial Countertop Blenders, 68 oz Blender Combo, Stainless Steel 9 Speed & 5 Functions Blender, for
shop.simon.com

Metropolitan Vacuum Cleaner Co., Inc. Professional Car Vacuum and Dryer
sharperimage.com
Step 2: Gathering Your Materials
Once you’ve planned your project, the next crucial step is to gather all necessary materials. This phase involves researching quality materials that will contribute to achieving pro-level results. Data from Les Numériques shows that 85% of DIY enthusiasts prefer quality over quantity when it comes to tools and materials.
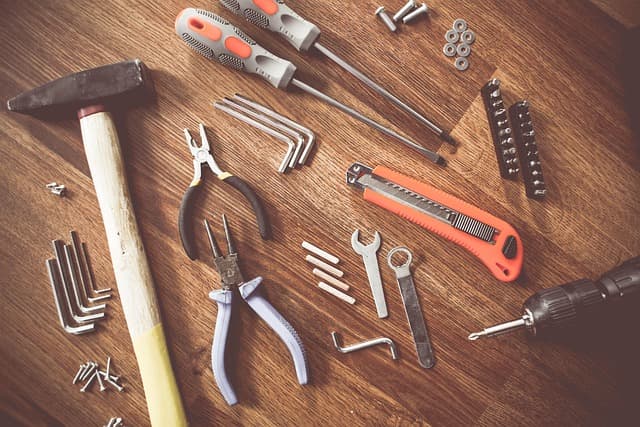
Start by listing everything needed based on your project plan—the right paints, woods, tools, and safety gear. Popular categories of tools include hand tools, power tools, and finishing supplies. When selecting materials, check for user reviews and ratings, ensuring you’re investing in reliable products that will endure.
Additionally, consider visiting local woodworking stores or suppliers for expert advice. Many professionals enjoy sharing tips that can improve your project’s outcome. Our recommendations for suitable products can be found below to ensure you’re well-equipped.
Step 3: Setting Up Your Workspace
Creating a dedicated workspace can drastically improve your efficiency and focus during the DIY process. Choose a well-ventilated area that is free from clutter. Make sure to have sufficient lighting, as this will prevent accidents and help you work with precision.
Once you have the location established, ensure that all necessary tools and materials are within reach. Organizing your workspace can help minimize distractions and allow for smoother workflow. It’s also crucial to ensure safety in your setup. Wear protective equipment, such as gloves and goggles, and keep first-aid supplies nearby.
A well-prepared workspace leads to fewer mistakes and a more enjoyable DIY experience. Moreover, cleaning your workspace before starting can significantly enhance both the efficiency and safety of your efforts.
Step 4: Executing Your DIY Project
With careful planning, the appropriate materials, and a suitable workspace, you are now ready to execute your DIY project. Follow the steps outlined during the planning phase, keeping your project plan handy to refer back to if needed. Always work methodically—take your time and pay attention to details.
One common mistake is rushing through the initial stages. For instance, measuring twice and cutting once will save materials and time, preventing unnecessary delays in project deadlines. Analyzing your work frequently ensures that you’re on track and allows you to make adjustments as necessary.
Throughout the execution, don’t hesitate to seek help or ask questions from experienced DIYers if challenges arise. Many online communities, including forums and social media groups, can offer assistance and support for any technical issues.
Checklist for Success
- [ ] Clearly outline your project goals.
- [ ] Conduct necessary skills assessments and training.
- [ ] Gather all materials and tools prior to commencement.
- [ ] Set up a safe and organized workspace.
- [ ] Follow your outlined steps carefully during execution.
- [ ] Review and adjust as needed.

SPELAB EGR/DPF Delete Kit 2008-2010 Ford 6.4L Powerstroke F250 F350 F450 - Red / 4" Downpipe-Back
spelabautoparts.com

Metropolitan Vacuum Cleaner Co., Inc. Professional Auto Detailing Vacuum
sharperimage.com
Professional Blender, Commercial Countertop Blenders, 68 oz Glass Jar Blender Combo, Stainless Steel for Frozen Drinks
bedbathandbeyond.com
Glossary
| Term | Definition |
|---|---|
| DIY (Do It Yourself) | Refers to the practice of creating, building, or repairing things independently without professional help. |
| Execution | The process of carrying out the planned actions in DIY projects. |
| Workspace | The designated area where one conducts their DIY tasks, ideally organized and safe. |
- What tools do I need for professional DIY solutions?
You will need essential tools such as a hammer, drill, saw, measuring tape, and safety gear.
- How can I improve my DIY skills?
Consider watching tutorial videos, joining DIY workshops, or practicing smaller projects to build your skills.
- Are there suitable materials for DIY projects?
Yes, selecting quality materials contributes to better results and durability.
- Where can I find inspiration for DIY projects?
Sources include online platforms like Pinterest, YouTube, and home improvement blogs.
📺 For further help: DIY Projects Unleashed, a comprehensive guide that dives deeper into executing professional DIY solutions. Search on YouTube for “how to DIY like a pro 2026.”
Recommended products
Selected by our experts
Professional Blender, Commercial Countertop Blenders, 68 oz Glass Jar Blender Combo, Stainless Steel for Frozen Drinks
bedbathandbeyond.com
Professional Blender, Commercial Countertop Blenders, 68 oz Glass Jar Blender Combo, Stainless Steel for Frozen Drinks
bedbathandbeyond.com

VEVOR - Blender for Smoothies, 61 oz 1400W, Professional Blender with Powerful Motor, Multi-Functional Food Processing Blender - Dark Gray
bestbuy.com

Professional Dishwasher Door Panel Kit for Viking FDWU524 Dishwasher - Cast Black
bestbuy.com

Professional Dishwasher Door Panel Kit for Viking FDWU524 Dishwasher - Slate Blue
bestbuy.com

Professional Dishwasher Door Panel Kit for Viking FDWU524 Dishwasher - Damascus Gray
bestbuy.com